35 Perfect Tape Up Haircuts
Classic Tape Up
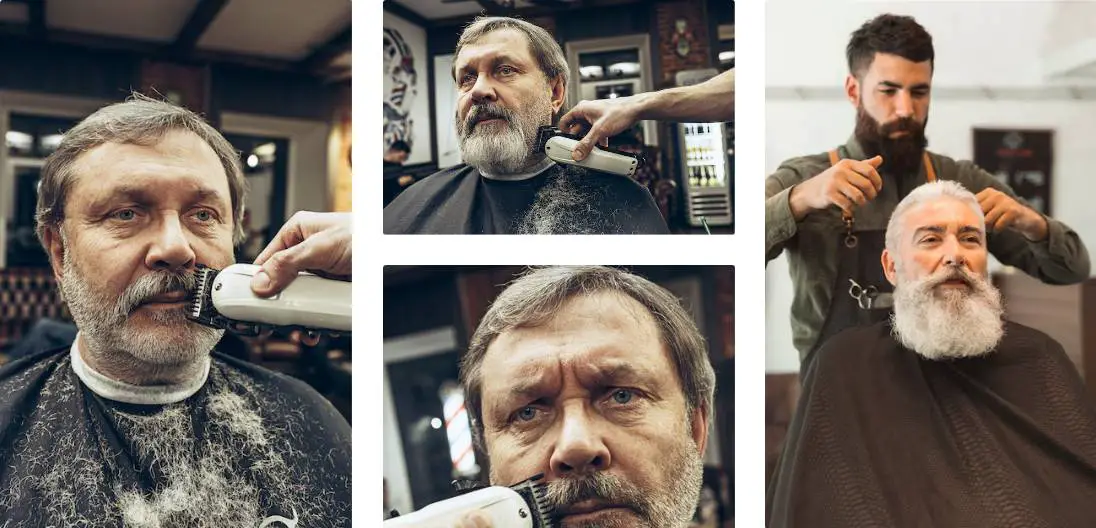
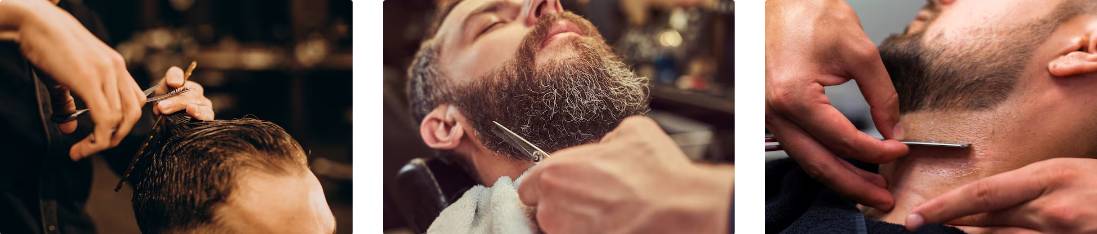
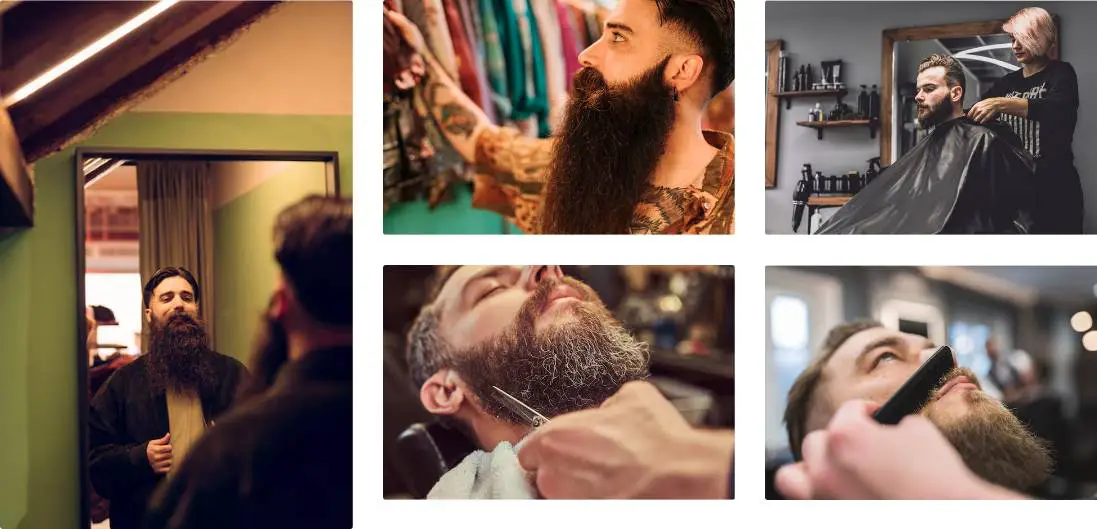
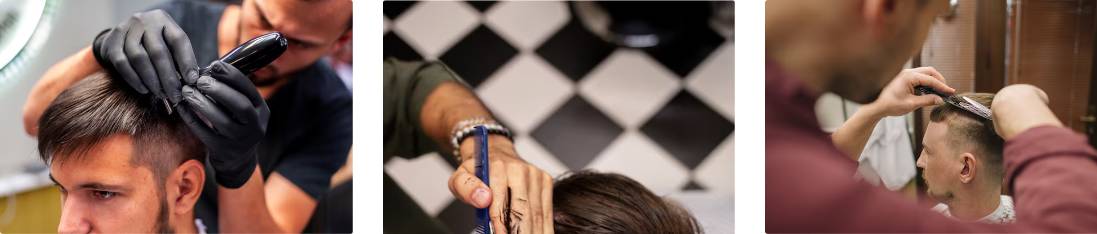
The tape up haircut is a classic style that has stood the test of time, offering a clean, sharp look with a tapered fade on the sides and back. This versatile cut is a favorite among those seeking a polished, well-groomed appearance that can be easily maintained.
Defining the Tape Up
At the heart of the tape up is the distinct line-up, where the hair is precisely trimmed to create a clean, defined edge along the hairline. This sharp contrast between the longer hair on top and the closely cropped sides and back is the signature of the tape up style. The tapered fade, which gradually blends the shorter hair into the longer lengths, adds depth and dimension to the overall look.
Achieving the Perfect Tape Up
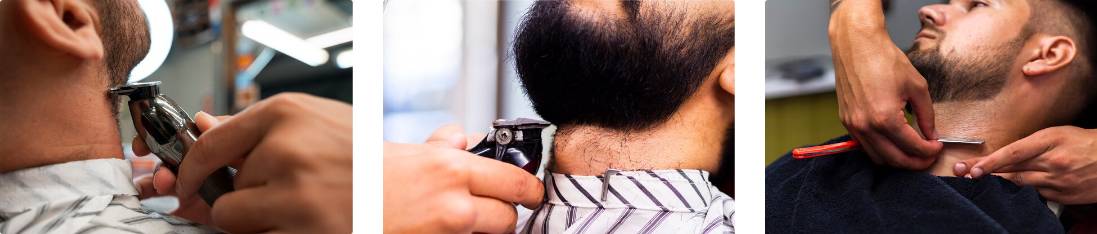
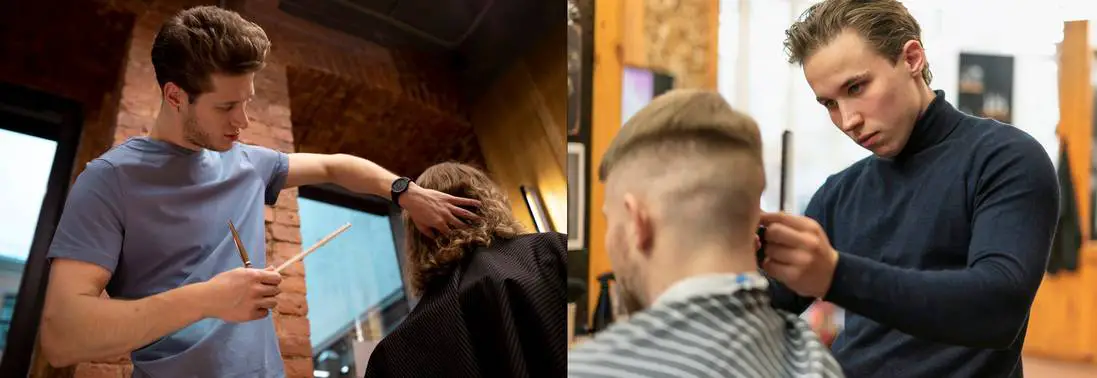
Crafting the perfect tape up requires the skilled hands of an experienced barber or stylist. The process begins with a thorough consultation to understand the client’s desired look and hair texture. From there, the stylist will carefully map out the cut, ensuring the line-up is precisely placed and the fade is seamlessly blended.
Attention to detail is crucial, as the tape up relies on clean, sharp lines and a smooth transition between the different lengths. The stylist may use a variety of tools, such as clippers, scissors, and razors, to achieve the desired effect. The final result should be a polished, well-groomed appearance that complements the individual’s facial features and personal style.
Wavy Tape Up
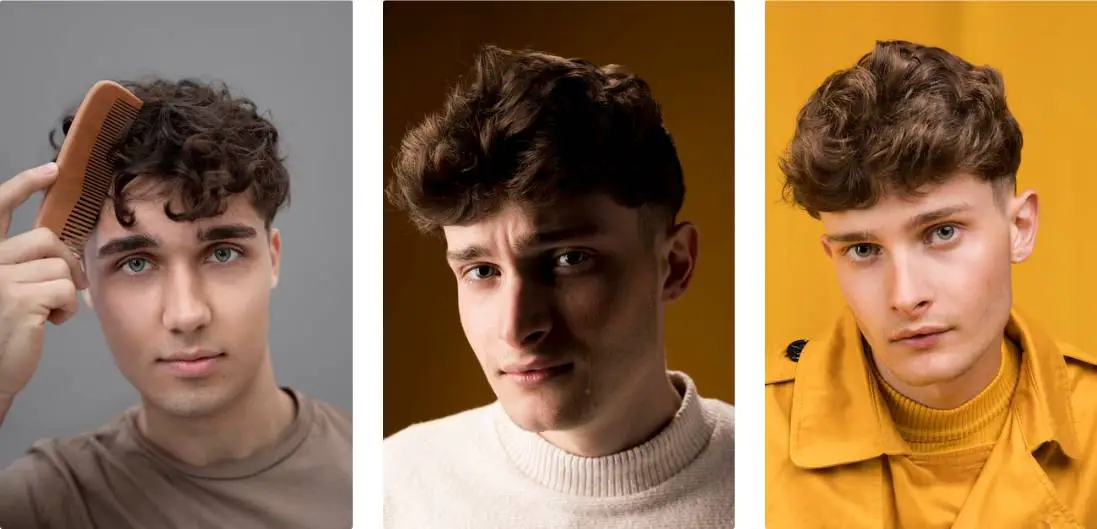
The wavy tape up hairstyle is a versatile and trendy option that combines the sleekness of a tapered cut with the natural movement and texture of waves or curls on top. This style is perfect for those who want to add a touch of effortless sophistication to their look while still maintaining a polished and well-groomed appearance.
Preparing the Hair
To achieve the wavy tape up look, it’s essential to start with clean, well-conditioned hair. Gently towel-dry your hair, leaving it slightly damp, and apply a small amount of a lightweight styling product, such as a curl-enhancing cream or a volumizing mousse. This will help to define and enhance the natural wave or curl pattern in your hair.
Creating the Waves or Curls
Depending on your hair type and desired level of texture, you can use a variety of techniques to create the wavy or curly top. For those with naturally wavy or curly hair, simply scrunch the product into your hair and allow it to air-dry or use a diffuser attachment on your hair dryer to gently dry and enhance the waves or curls. If your hair is straighter, you can use a large-barrel curling iron or hot rollers to create soft, natural-looking waves.
Tapering the Sides and Back
Once you’ve achieved the desired wave or curl pattern on top, it’s time to focus on the sides and back of your hair. Using sharp haircutting scissors or clippers, gradually taper the hair from the temples down to the nape of the neck, creating a clean, well-defined outline. This tapered effect will help to balance the volume and texture on top, giving the overall style a polished and intentional look.
Finishing Touches
To complete the wavy tape up style, apply a small amount of a light-hold styling product, such as a pomade or wax, to the tapered sides and back, smoothing them down and creating a sleek, uniform appearance. Avoid using too much product, as you want to maintain the natural movement and texture of the waves or curls on top.
Curly Tape Up

If you’re blessed with naturally curly hair, the curly tape up hairstyle offers a unique and eye-catching way to showcase your luscious locks. This style combines the sleek, tapered sides of a traditional tape up with the voluminous, textured curls on top, creating a striking and modern look that’s sure to turn heads.
Unleashing the Power of Curls
The key to nailing the curly tape up is to embrace your natural curl pattern. Rather than fighting against your hair’s natural texture, this style celebrates it, allowing your curls to take center stage. By keeping the sides closely cropped or faded, the focus is drawn to the lush, voluminous curls on top, creating a striking contrast that adds depth and dimension to your overall look.
Achieving the Perfect Curly Tape Up
To achieve the perfect curly tape up, it’s essential to work with a skilled barber or stylist who understands the unique needs of curly hair. They’ll be able to expertly shape and sculpt the sides, ensuring a clean, tapered look, while also carefully shaping and defining the curls on top. Proper product selection and application are also key, as the right styling products can help enhance and control your natural curl pattern without weighing it down.
Embracing Your Individuality
The beauty of the curly tape up lies in its ability to showcase your unique hair texture and personal style. Whether you have tight, coily curls or loose, wavy locks, this versatile style can be tailored to complement your individual features and hair type. By embracing your natural curl pattern, you’ll not only achieve a head-turning look but also boost your confidence and celebrate the inherent beauty of your hair.
Faux Hawk Tape Up
The faux hawk tape up is a versatile hairstyle that combines the edgy appeal of a faux hawk with the clean, polished look of a tape up. This style is perfect for those who want to add a touch of modern flair to their appearance without committing to a full-blown mohawk. By strategically styling the hair on top into a faux hawk and keeping the sides neatly tapered, you can create a striking and contemporary look that is both stylish and easy to maintain.
Preparing the Hair
The key to achieving the faux hawk tape up is proper preparation of the hair. Start by washing and conditioning your hair, ensuring it is clean and free of any product buildup. Towel-dry your hair, leaving it slightly damp, and apply a small amount of styling product, such as a pomade or wax, to the roots and lengths. This will help provide the necessary hold and texture for the faux hawk.
Shaping the Faux Hawk
Using a comb or your fingers, begin styling the hair on top into a faux hawk shape. Gently lift and tease the hair at the crown, creating a slight peak or ridge. Secure this section with a small amount of styling product, ensuring it maintains its shape. Carefully smooth and taper the sides of the hair, blending the faux hawk seamlessly into the tapered sides.
Finishing Touches
To complete the faux hawk tape up, use a blow dryer to set the style and add extra volume and definition to the faux hawk. Finish with a light hold hairspray to keep the style in place throughout the day. You can also experiment with different styling techniques, such as adding a side part or incorporating a textured finish, to personalize the look and make it your own.
The faux hawk tape up is a versatile and modern hairstyle that can be dressed up or down, making it a great option for a variety of occasions. Whether you’re looking to add a touch of edge to your everyday look or want to make a bold statement, this style is sure to turn heads and leave a lasting impression.
Messy Tape Up
In a world where perfection is often the unattainable goal, the messy tape up offers a refreshing alternative. This hairstyle embraces the beauty of imperfection, allowing for a more relaxed and effortless look that exudes a sense of carefree charm.
Tousled and Textured Elegance
The key to the messy tape up lies in the intentional lack of precision. Unlike the sleek and polished tape up, this style leaves the hair on top slightly tousled and textured, creating a natural, lived-in appearance. This subtle imperfection adds depth and character to the overall look, making it a perfect choice for those who want to channel a more laid-back, yet stylish, vibe.
Embracing the Unexpected
The messy tape up celebrates the unexpected. Rather than striving for a perfectly coiffed appearance, this hairstyle encourages you to embrace the natural movement and flow of your hair. By allowing for a bit of playful disarray, the messy tape up adds an element of personality and individuality to your look, setting you apart from the crowd.
Versatility and Effortless Charm
One of the key advantages of the messy tape up is its versatility. Whether you’re dressing up for a special occasion or simply running errands, this hairstyle can seamlessly transition between different settings. Its effortless charm and relaxed aesthetic make it a go-to choice for those who value style without sacrificing comfort or convenience.
Achieving the Messy Tape Up
Crafting the perfect messy tape up requires a delicate balance of technique and intentional imperfection. Start by securing the sides and back of your hair in a tight tape up, but leave the hair on top slightly loosened and tousled. Use your fingers to gently manipulate the strands, creating a natural, textured appearance. Finish with a light hold product to maintain the desired level of messiness without sacrificing the style’s longevity.
Embrace the beauty of the messy tape up and let your hair tell its own unique story. This hairstyle celebrates the imperfections that make you who you are, allowing you to exude a confident and effortless charm that is truly one-of-a-kind.
Slicked Back Tape Up
The slicked back tape up hairstyle is a popular choice for those seeking a polished and refined appearance. This style combines the sleekness of a slicked back look with the structured hold of a tape up, resulting in a sophisticated and modern aesthetic. Whether you’re attending a formal event or simply want to elevate your everyday look, the slicked back tape up can be a versatile and stylish option.
Preparing the Hair
The key to achieving the perfect slicked back tape up is proper preparation. Start by thoroughly cleansing your hair, ensuring it is free of any product buildup or excess oil. This will help the styling products adhere better and provide a longer-lasting hold. Once your hair is clean, apply a small amount of a high-quality pomade or styling gel to the roots and mid-lengths, focusing on the areas you want to slick back.
Taping and Slicking Back
Next, use a fine-toothed comb to carefully comb your hair back, smoothing it into the desired slicked-back shape. Secure the hair in place with a strong-hold tape, ensuring the tape is applied close to the scalp for a seamless and natural-looking finish. Gently press the tape down to ensure a secure hold, and then use your fingers or a comb to further smooth and shape the slicked-back portion of your hair.
Finishing Touches
To complete the look, apply a light mist of a high-hold hairspray to the slicked-back section, focusing on the edges and any flyaways. This will help keep your style in place throughout the day or evening. For an extra touch of shine and definition, you can also use a small amount of pomade or styling wax to add a subtle sheen to the slicked-back portion of your hair.
Spiky Tape Up
The spiky tape up hairstyle is a bold and dynamic look that adds a touch of edge to any personal style. This versatile style can be tailored to suit a variety of hair types and face shapes, making it a popular choice among those seeking a striking and attention-grabbing look.
Preparing the Hair
The key to achieving the perfect spiky tape up starts with proper hair preparation. Begin by washing and conditioning the hair, ensuring it is clean and free of any product buildup. Towel-dry the hair, leaving it slightly damp, as this will help the styling products adhere better. Apply a small amount of volumizing mousse or styling gel from root to tip, focusing on the areas where you want the spikes to form.
Styling the Spikes
Using a blow dryer and a round brush, begin styling the hair upwards and outwards, creating the desired spiky effect. Work in small sections, directing the airflow towards the roots to lift the hair and create the spiky texture. As you style, use your fingers to gently tease and shape the spikes, ensuring they stand tall and defined.
Securing the Style
Once the spikes are in place, it’s time to lock in the look. Apply a strong-hold hairspray or wax to the styled areas, focusing on the tips of the spikes to keep them in place throughout the day. Avoid over-applying product, as this can weigh down the hair and compromise the desired spiky effect.
Customizing the Spiky Tape Up
The beauty of the spiky tape up is its versatility. Experiment with different styling techniques, such as using a flat iron to create sharper, more defined spikes or incorporating a side part for a more asymmetrical look. Additionally, consider the length and texture of your hair when styling, as this will impact the overall appearance of the spikes.
With the right techniques and products, you can achieve a bold and dynamic spiky tape up hairstyle that will turn heads and make a statement. Remember to have fun with the process and don’t be afraid to experiment until you find the perfect look that suits your personal style.
Tapered Tape Up
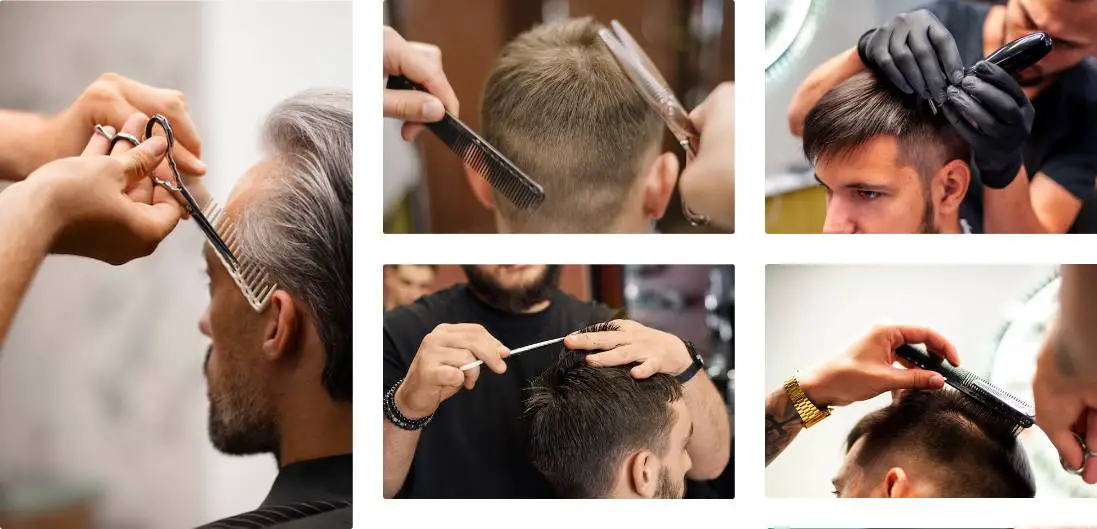
The tapered tape up is a popular hairstyle that offers a clean and well-groomed appearance. Unlike traditional tape ups, which can sometimes appear harsh or abrupt, the tapered version features a gradual taper on the sides and back, creating a seamless transition between the longer hair on top and the shorter sides and back.
The Benefits of a Tapered Tape Up
One of the primary advantages of the tapered tape up is its versatility. This style can be adapted to suit a wide range of face shapes and hair types, making it a popular choice for men of all backgrounds. The gradual taper also helps to elongate the face, creating a more balanced and proportionate look.
Another key benefit of the tapered tape up is its low-maintenance nature. The gradual taper means that the style can be easily maintained with regular trims, without the need for frequent visits to the barber. This makes it an attractive option for busy individuals who want to look their best without spending too much time on their hair.
Achieving the Perfect Tapered Tape Up
To achieve the perfect tapered tape up, it’s important to work with an experienced barber or stylist who understands the nuances of this particular hairstyle. They will be able to assess your hair type and face shape, and then create a customized taper that flatters your features.
During the cutting process, the barber will typically start with a longer length on top, gradually tapering the sides and back to create a seamless transition. They may also use techniques like fading or blending to ensure that the taper is smooth and natural-looking.
Once the cut is complete, it’s important to maintain the style with regular trims and proper hair care. This may involve using styling products like pomades or waxes to keep the hair in place and enhance the tapered look.
Textured Tape Up
The textured tape up is a hairstyle that combines the sleek and polished look of a tape up with a touch of natural, effortless texture. This style is perfect for those who want to maintain a well-groomed appearance while still embracing a more relaxed, lived-in vibe. By leaving the hair on top slightly uneven and textured, you can create a style that is both sophisticated and undone.
Preparing the Hair
The key to achieving the textured tape up is in the preparation. Start by washing and conditioning your hair, ensuring it is clean and free of any product buildup. Towel-dry your hair, leaving it slightly damp. Apply a small amount of a volumizing or texturizing product to the roots and mid-lengths of your hair, focusing on the areas you want to have a more textured appearance.
Taping Up the Sides
Next, use a high-quality tape or adhesive to secure the sides and back of your hair, creating the classic tape up look. Be sure to apply the tape carefully and evenly, ensuring a smooth and seamless finish. Avoid pulling the tape too tight, as this can create an unnatural, overly slicked-back appearance.
Texturizing the Top
Once the sides are taped up, turn your attention to the hair on top. Use your fingers or a small amount of a texturizing product to gently tousle and lift the hair, creating a slightly uneven, natural-looking texture. Avoid over-styling or using too much product, as this can weigh down the hair and detract from the desired effortless look.
Finishing Touches
To complete the textured tape up, use a light-hold hairspray or finishing product to lightly hold the style in place, while still allowing for some movement and natural-looking texture. Avoid heavy, high-shine products, as these can make the style appear too polished and detract from the desired effortless aesthetic.
With the right preparation, technique, and product selection, you can achieve a textured tape up that is both stylish and low-maintenance. This versatile hairstyle is perfect for a range of occasions, from casual outings to more formal events, making it a go-to choice for those who want to look put-together without sacrificing their personal style.
Undercut Tape Up
The undercut tape up is a versatile hairstyle that combines the clean-cut look of an undercut with the textured, flowing appearance of a tape up. This style is perfect for those who want to make a bold statement while maintaining a polished, modern aesthetic. In this section, we’ll explore the key steps to achieving the undercut tape up and provide tips to help you pull off this striking look.
Preparing the Hair
The foundation of the undercut tape up is the precise execution of the undercut. Start by trimming the sides and back of the hair to the desired length, typically between 1-3 inches. This will create the clean, tapered look that defines the undercut. Be sure to use sharp, high-quality clippers to ensure a clean, even cut.
Styling the Tape Up
With the undercut in place, it’s time to focus on the longer, textured top section of the hair. Use a high-quality pomade or wax to add definition and hold to the hair. Gently work the product through the strands, ensuring even distribution from root to tip. Then, use your fingers or a comb to style the hair, creating a smooth, swept-back look. Experiment with different techniques, such as side-parting or a messy, textured finish, to find the style that best suits your face shape and personal preferences.
Maintaining the Look
To keep your undercut tape up looking its best, regular trims and touch-ups are essential. Schedule appointments with your trusted barber or stylist every 4-6 weeks to maintain the clean, sharp lines of the undercut. Additionally, invest in high-quality hair products that will help you recreate the style at home and prolong the life of your cut.
Embracing the Versatility
One of the great advantages of the undercut tape up is its versatility. This style can be adapted to suit a wide range of personal styles, from the sleek and sophisticated to the edgy and rebellious. Experiment with different lengths, textures, and styling techniques to find the perfect iteration of the undercut tape up that complements your unique look and personality.
Blowout Tape Up
The blowout tape up is a captivating hairstyle that combines the volume and drama of a blowout with the sleek sophistication of a tape-up. This style is perfect for those seeking a touch of glamour and a head-turning appearance. By following a few simple steps, you can achieve this stunning look and elevate your overall aesthetic.
Preparing the Hair
Begin by thoroughly cleansing your hair with a nourishing shampoo and conditioner. This will ensure a clean canvas for the styling process. Once your hair is washed and towel-dried, apply a heat-protectant product to safeguard your strands from the high temperatures of the styling tools.
Volumizing the Blowout
Using a round brush and a high-powered blow dryer, create a voluminous blowout. Start by directing the airflow at the roots, lifting and directing the hair upwards. Gradually work your way down the length of the hair, using the brush to smooth and shape the strands. Focus on adding maximum volume and lift at the crown and sides of the head, creating a dramatic, eye-catching silhouette.
Securing the Tape Up
Once you’ve achieved the desired level of volume and bounce, it’s time to transition into the tape-up portion of the style. Gather the hair at the crown and secure it with a strong-hold hairspray or styling gel. Carefully wrap the hair around your fingers, creating a smooth, sleek bun or chignon at the top of your head. Secure the style with bobby pins or a hair tie, ensuring a seamless and polished finish.
Finishing Touches
To complete the look, use a small amount of shine serum or hair oil to smooth any flyaways and add a glossy, healthy-looking sheen to your hair. Finally, mist the entire style with a light-hold hairspray to keep the blowout and tape-up in place throughout the day or evening.
The blowout tape up is a versatile and eye-catching hairstyle that can elevate any look, from casual to formal. By mastering the art of creating voluminous, bouncy roots and a sleek, sophisticated tape-up, you can achieve a stunning and glamorous appearance that is sure to turn heads.
Pompadour Tape Up
The pompadour tape up is a hairstyle that exudes a timeless, sophisticated charm. This style combines the classic pompadour, where the hair on top is styled upwards and backward, with the clean-cut appearance of a tape up, where the sides and back are closely trimmed or faded. The result is a striking, retro-inspired look that can elevate any outfit and make a bold statement.
Mastering the Pompadour Technique
The key to achieving the perfect pompadour lies in the technique. It requires precision, patience, and the right products. Begin by towel-drying your hair, leaving it slightly damp. Apply a small amount of pomade or styling wax to the roots and work it through the hair, focusing on the top section. Use a round brush or your fingers to lift the hair upwards and backward, creating the signature pompadour shape. Secure the style with a light-hold hairspray to ensure it maintains its shape throughout the day.
Blending the Tape Up
The tape up component of this hairstyle is achieved through a close trim or fade on the sides and back of the head. This creates a clean, well-groomed appearance that complements the voluminous pompadour on top. To achieve the perfect tape up, it’s best to visit a skilled barber or stylist who can expertly blend the longer hair on top with the shorter sides and back, ensuring a seamless transition.
Quiff Tape Up
Mastering the Quiff Foundation
The foundation of a successful quiff tape up lies in creating a voluminous, textured quiff. Start by applying a small amount of styling product, such as a pomade or wax, to damp hair. Use your fingers to lift and style the hair on top, directing it upwards and slightly back. Blow-dry the hair, using a round brush to build height and shape the quiff. Finish with a light hold hairspray to keep the style in place.
Taping the Sides and Back
Once the quiff is in place, it’s time to focus on the sides and back of the head. Apply a strong-hold tape, such as gaffer tape or medical tape, to the areas you want to keep flat and sleek. Gently pull the tape taut, ensuring a smooth, seamless finish. Be careful not to pull the tape too tight, as this can cause discomfort and damage the hair.
Blending the Quiff and Taped Sections
To create a cohesive, polished look, it’s essential to blend the quiff with the taped sections. Use a small amount of styling product to smooth the transition between the two areas, ensuring a natural, unified appearance. Lightly brush or comb the hair to blend the styles, being mindful not to disrupt the quiff’s shape.
Finishing Touches and Maintenance
Complete the look by applying a light hold hairspray to the entire style, focusing on the quiff to keep it in place throughout the day. Regularly check the tape and reapply as needed to maintain the sleek, taped appearance. With proper technique and attention to detail, you can achieve a stylish and long-lasting quiff tape up that will turn heads.
Shaved Sides Tape Up
The shaved sides tape up hairstyle is a bold and dramatic look that creates a striking contrast between the longer hair on top and the closely cropped sides and back. This style is perfect for those who want to make a statement and stand out from the crowd. To achieve this look, you’ll need to work with a skilled barber or hairstylist who can expertly execute the shaved sides and tape up technique.
Preparing the Hair
The first step in creating the shaved sides tape up is to grow out the hair on the top of the head to the desired length. This longer hair will be the focal point of the style, so it’s important to ensure it’s healthy and well-maintained. Your stylist will then use clippers to shave the sides and back of your head, leaving just a small amount of hair to create a clean, defined line.
Taping Up the Longer Hair
Once the sides and back are shaved, your stylist will use a technique called “taping up” to style the longer hair on top. This involves using a strong-hold styling product, such as a pomade or wax, to slick the hair back and up, creating a sleek, polished look. The hair is then secured in place with tape, which helps to hold the style in place throughout the day.
Maintaining the
To keep your shaved sides tape up looking its best, you’ll need to visit your stylist regularly for touch-ups and trims. The shaved sides will need to be maintained to keep the clean, defined line, and the longer hair on top will need to be trimmed to maintain the desired length and shape. Additionally, you’ll need to use high-quality styling products to keep the tape up in place and looking sharp.
Skin Fade Tape Up
The skin fade tape up is a popular hairstyle that combines the clean, sharp look of a skin fade with the versatility of a tape up. This style offers a seamless transition from short to long hair, creating a polished and sophisticated appearance. Whether you’re looking to elevate your professional look or simply want to try a new, modern style, the skin fade tape up is a great option to consider.
Understanding the Skin Fade
The skin fade, also known as a zero fade or bald fade, is a technique that gradually tapers the hair from a close-cropped or shaved nape and sides to a longer length at the top of the head. This gradual transition creates the illusion of the hair “fading” into the skin, resulting in a clean and defined look. The skin fade can be customized to suit various face shapes and personal preferences, making it a versatile choice for many individuals.
Incorporating the Tape Up
The tape up, on the other hand, refers to the longer hair on the top of the head that is typically styled in a slicked-back or pompadour-inspired manner. This longer length at the top provides the opportunity to experiment with different styling techniques, from a classic comb-over to a more modern, textured look. By combining the skin fade with the tape up, the resulting hairstyle offers a harmonious blend of short and long elements, creating a visually striking and well-balanced appearance.
Achieving the Perfect
To achieve the perfect skin fade tape up, it’s essential to work with a skilled barber or hairstylist who understands the nuances of this style. They will be able to expertly blend the skin fade with the tape up, ensuring a seamless transition and a polished, professional look. Additionally, proper maintenance and regular trims are crucial to keeping the skin fade tape up looking its best, as the faded sides and back will require more frequent attention than the longer top section.
Bald Fade Tape Up
The bald fade tape up is a versatile and stylish haircut that combines a clean-shaven look on the sides and back with a tapered transition to the longer hair on top. This striking combination creates a modern and sophisticated appearance that is perfect for those looking to make a bold statement with their hairstyle.
Mastering the Bald Fade
The key to achieving the bald fade is in the precision of the clipping. The hair on the sides and back is closely trimmed, using a razor or electric clipper, to create a smooth, seamless transition from the skin to the longer hair on top. This requires a skilled barber or stylist who can carefully blend the different lengths to create a natural-looking fade.
Complementing the Bald Fade with the Tape Up
The tape up element of this style involves styling the longer hair on top into a sleek, slicked-back look. This is typically achieved by using a strong-hold pomade or wax, which is applied to the hair and then combed or brushed back, creating a polished and refined appearance. The contrast between the bald fade and the tapered top creates a striking and modern look that is sure to turn heads.
Maintaining the
Keeping the bald fade tape up looking its best requires regular maintenance. The sides and back will need to be trimmed every few weeks to maintain the clean-shaven look, while the top will require regular styling with pomade or wax to keep the tape up in place. It’s also important to use high-quality hair products and to avoid over-styling, which can lead to damage and breakage.
Embracing the
The bald fade tape up is a bold and confident hairstyle that is perfect for those who want to make a statement with their appearance. Whether you’re looking to update your look or trying something new, this style is sure to turn heads and leave a lasting impression. With the right styling and maintenance, the bald fade tape up can be a versatile and stylish choice for any occasion.
Low Fade Tape Up
The low fade tape up is a popular hairstyle that combines the clean lines of a tape up with the subtle, blended look of a low fade. This style offers a versatile and sophisticated appearance, making it a great choice for those seeking a polished yet understated look.
Understanding the Low Fade
The low fade is a type of fade haircut where the hair gradually transitions from longer on top to shorter on the sides and back. The fade starts at a lower point on the head, typically around the temples or ears, creating a more subtle and gradual transition compared to a high fade. This style is ideal for those who want to maintain a bit more length on the sides while still achieving a clean, well-groomed appearance.
Combining the Tape Up with the Low Fade
The tape up, also known as a taper up or edge up, is a hairstyle that features a sharp, defined line at the temples and neckline. By combining the low fade with the tape up, you create a style that offers the best of both worlds. The low fade provides a softer, more natural-looking transition, while the tape up maintains the clean, polished lines that are characteristic of this hairstyle.
Achieving the Perfect
To get the perfect low fade tape up, it’s important to work with an experienced barber or stylist who can precisely execute the fade and tape up. They will need to carefully blend the longer hair on top with the shorter sides and back, ensuring a seamless transition. The tape up portion should be sharp and well-defined, complementing the subtle fade.
Proper maintenance is also key to keeping the low fade tape up looking its best. Regular trims and touch-ups will help maintain the clean lines and prevent the style from becoming overgrown or uneven. With the right care and attention, the low fade tape up can be a versatile and stylish choice for those seeking a modern, refined look.
Medium Fade Tape Up
The medium fade tape up is a versatile hairstyle that combines the clean-cut look of a tapered fade with the textured, longer hair on top. This style strikes a balance between the extreme short sides of a high fade and the longer, more voluminous top of a tape up. The result is a modern, polished appearance that can be easily styled and adapted to suit various face shapes and personal preferences.
Before visiting your barber or stylist, it’s essential to have a clear understanding of the desired look. Bring reference images or be prepared to describe the specific length and fade you’d like to achieve. This will help your stylist create a customized cut that complements your features and personal style. Additionally, consider your hair type, growth patterns, and any styling preferences to ensure the medium fade tape up is a suitable choice.
Proper maintenance is key to keeping your medium fade tape up looking its best. Regular trims, typically every 2-4 weeks, are necessary to maintain the clean, tapered look on the sides and back. Additionally, investing in high-quality styling products, such as pomades, waxes, or creams, can help you achieve the desired texture and hold on the longer hair on top. Proper hair care, including regular washing and conditioning, will also contribute to the overall health and appearance of your medium fade tape up.
One of the great advantages of the medium fade tape up is its versatility. The longer hair on top can be styled in a variety of ways, from a sleek, slicked-back look to a textured, messy style. Experiment with different products and techniques to find the perfect look that complements your face shape and personal style. Additionally, the medium fade can be adjusted to create a more dramatic or subtle transition, depending on your preferences.
High Fade Tape Up
The high fade tape up is a bold and striking hairstyle that has gained immense popularity in recent years. This style features a dramatic contrast between the longer hair on top and the closely cropped sides and back, creating a sleek and modern look that is both stylish and versatile.
Understanding the Anatomy of the
The key to achieving the perfect high fade tape up lies in the precise execution of the fade. The fade begins high on the sides and back, gradually tapering down to a close, clean-shaven look near the nape of the neck. This creates a seamless transition from the longer hair on top to the shorter, tapered sides, resulting in a polished and well-defined appearance.
Mastering the Technique
Cutting a high fade tape up requires a skilled hand and a keen eye for detail. The barber must carefully blend the longer hair on top with the shorter sides, ensuring a smooth and even transition. This is typically achieved through the use of clippers and scissors, with the barber gradually reducing the length of the hair as they work their way down the sides and back.
Maintaining the
Keeping a high fade tape up looking its best requires regular maintenance and touch-ups. The fade will need to be re-cut every few weeks to maintain the sharp, defined lines, and the longer hair on top may need to be trimmed or styled as needed. With proper care and attention, the high fade tape up can be a striking and long-lasting hairstyle that will turn heads wherever you go.
Customizing the
One of the great things about the high fade tape up is its versatility. The style can be customized to suit a wide range of face shapes, hair textures, and personal preferences. Some may opt for a more dramatic, angular fade, while others may prefer a softer, more gradual transition. Experimenting with different styling products and techniques can also help to personalize the look and make it your own.
Burst Fade Tape Up
The burst fade tape up is a captivating hairstyle that combines the precision of a tape up with the dynamic fading effect of a burst fade. This style is perfect for those seeking a modern, edgy look that stands out from the crowd. In this section, we’ll explore the key steps to achieving this distinctive haircut.
Defining the Burst Fade
The burst fade is a variation of the classic fade haircut, where the hair gradually transitions from a shorter length at the sides and back to a longer length at the top. However, the burst fade takes this concept a step further by creating a more dramatic, circular fading pattern. This effect is achieved by gradually increasing the length of the fade as it moves away from the nape of the neck, creating a “burst” of longer hair that radiates outward.
Combining the Tape Up and Burst Fade
To create the burst fade tape up, the barber or stylist will first establish a clean, sharp tape up along the sides and back of the head. This involves using clippers to create a distinct, defined line where the shorter hair meets the longer hair on top. Once the tape up is in place, the burst fade is then blended into the longer hair on top, gradually increasing in length as it moves away from the nape of the neck.
Achieving the Desired Look
The key to a successful burst fade tape up lies in the precision of the fade and the seamless blending between the shorter and longer hair. The barber or stylist must carefully adjust the clippers and use a variety of techniques, such as freehand cutting and point-cutting, to create a smooth, natural-looking transition. Additionally, the length and shape of the longer hair on top can be customized to suit the individual’s face shape and personal style preferences.
Maintaining the
To keep the burst fade tape up looking its best, regular trims and touch-ups are essential. The fade will require more frequent maintenance, as the hair at the sides and back will grow out more quickly than the longer hair on top. With proper care and attention, the burst fade tape up can be a striking and long-lasting hairstyle that turns heads wherever you go.
Temp Fade Tape Up

The temp fade tape up is a hairstyling technique that offers a more gradual and natural-looking transition between short and long hair. Unlike a traditional buzz cut or shaved sides, this approach allows you to maintain a longer length on the top while gradually fading the sides and back, creating a harmonious and stylish appearance.
The Benefits of
One of the primary advantages of the temp fade tape up is the ability to experiment with different lengths and styles without committing to a drastic change. This technique provides a versatile solution for those who want to explore new looks without the risk of an abrupt or uneven transition. By gradually tapering the sides and back, the temp fade tape up creates a seamless blend that can be easily maintained and adjusted as your hair grows out.
Achieving the Perfect
Executing a successful temp fade tape up requires a skilled hand and attention to detail. The process typically involves using a combination of clippers, scissors, and tape to create the desired fade effect. The tape is strategically placed along the sides and back, allowing the hair to be gradually trimmed and blended, resulting in a smooth and natural-looking transition.
Customizing Your
One of the great aspects of the temp fade tape up is the ability to personalize it to suit your individual style and preferences. The degree of the fade, the length of the top hair, and the overall shape can all be tailored to your liking. Whether you prefer a more subtle, gradual fade or a more dramatic contrast, the temp fade tape up offers a versatile canvas for you to explore and express your unique sense of style.
Maintaining the
Proper maintenance is key to keeping your temp fade tape up looking its best. Regular trims and touch-ups are necessary to maintain the seamless transition and prevent the fade from becoming uneven or growing out too quickly. With the right care and attention, your temp fade tape up can last for several weeks, allowing you to enjoy your desired look for an extended period.
Taper Fade Tape Up
Mastering the Taper Fade Technique
The taper fade is a popular hairstyle that combines a gradual transition from short to long hair, creating a sleek and polished look. To achieve this style, the sides and back of the head are trimmed progressively shorter, blending seamlessly into the longer hair on top. This technique requires precision and skill, as the key is to create a smooth, natural-looking fade that enhances the overall aesthetic.
Preparing for the Tape Up
The tape up is the final step in the taper fade process, where the longer hair on top is styled and secured in place. This step is crucial in achieving the desired look, as it helps to define the shape and structure of the hairstyle. Before beginning the tape up, it’s important to ensure that the taper fade is properly executed, with a clean and even transition from short to long hair.
Executing the Tape Up
To execute the tape up, the longer hair on top is carefully combed and styled, often using a styling product such as pomade or wax. The hair is then secured in place using a tape or bandage, which helps to hold the style in place and create a sleek, polished appearance. The placement and tension of the tape are crucial, as they can affect the overall look and feel of the hairstyle.
Maintaining the
Proper maintenance is key to keeping the taper fade tape up looking its best. Regular trims and touch-ups are necessary to maintain the clean, sharp lines of the fade, and the tape up should be refreshed as needed to keep the style in place. With the right care and attention, the taper fade tape up can be a versatile and stylish choice for those looking to achieve a modern, sophisticated look.
Razor Fade Tape Up
The razor fade tape up is a popular hairstyle that combines the clean lines of a tape up with the seamless transition of a razor fade. This style is a favorite among those who want a sharp, well-groomed look that exudes confidence and sophistication. In this section, we’ll dive into the key steps to achieving the perfect razor fade tape up, ensuring you leave the barbershop feeling like a million bucks.
Preparing the Canvas
The foundation of a great razor fade tape up starts with proper preparation. Begin by thoroughly cleansing the hair and scalp, ensuring a clean canvas for the cut. This not only helps the hair respond better to the razor but also creates a more hygienic environment for the styling process.
Mastering the Fade
The razor fade is the cornerstone of this hairstyle, and it requires a skilled hand to execute flawlessly. Your barber will start by using clippers to gradually blend the hair from the nape of the neck and sides, creating a seamless transition from the longer hair on top to the shorter, faded sides. This process requires precision and an eye for detail to ensure a clean, uniform fade that complements the face shape.
Defining the Tape Up
With the fade in place, the next step is to create the sharp, clean lines of the tape up. Your barber will use a straight razor to carefully outline the hairline, carving a distinct separation between the longer hair on top and the faded sides. This step is crucial for achieving the signature look of the razor fade tape up, as the crisp lines add an extra level of sophistication to the style.
Finishing Touches
To complete the look, your barber may apply a light hold styling product to the longer hair on top, allowing you to style it in a variety of ways, from a sleek, slicked-back look to a textured, messy style. The final result is a polished, modern hairstyle that exudes confidence and a well-groomed appearance.
Achieving the perfect razor fade tape up requires the expertise of a skilled barber, as well as a commitment to proper hair care and maintenance. By following these steps, you can ensure that your next visit to the barbershop leaves you with a hairstyle that turns heads and boosts your self-assurance.
Bald Tape Up
In the ever-evolving world of men’s hairstyles, the bald tape up has emerged as a bold and captivating choice. This striking look combines the clean-shaven sides and back with a longer, textured top, creating a striking contrast that commands attention.
Achieving the Perfect Bald Tape Up
Crafting the perfect bald tape up requires a skilled hand and a keen eye for detail. The process begins with a close shave on the sides and back, leaving a clean, bald canvas. The top hair, however, is left longer, allowing for a range of styling options. From a sleek, slicked-back look to a tousled, textured finish, the versatility of the bald tape up is truly remarkable.
Embracing the Confidence Boost
Beyond its aesthetic appeal, the bald tape up offers a confidence-boosting experience. The bold contrast between the shaved sides and the longer top hair creates a striking, masculine silhouette that can enhance one’s overall appearance. This hairstyle is not for the faint of heart, but for those who are ready to embrace their individuality and make a bold statement.
Maintenance and Upkeep
Maintaining the bald tape up requires a bit of diligence, but the results are well worth the effort. Regular trims to the sides and back, along with strategic styling of the top hair, are essential to keeping the look sharp and polished. With the right products and a skilled barber, the bald tape up can be easily maintained, ensuring a consistently impressive appearance.
Embracing the Bald Tape Up Lifestyle
Choosing the bald tape up is more than just a hairstyle; it’s a lifestyle choice. This bold look exudes confidence, individuality, and a willingness to step outside the traditional boundaries of men’s grooming. By embracing the bald tape up, individuals can showcase their personal style and make a lasting impression on those around them.
Colored Tape Up
In the ever-evolving world of hair styling, one trend that has been captivating the attention of fashion-forward individuals is the colored tape-up. This innovative technique allows you to add a touch of vibrancy and personality to your hairstyle, transforming a simple look into a statement-making masterpiece.
Embracing the Versatility of Colored Tape-Ups
Colored tape-ups offer a unique and customizable way to express your individuality. Whether you’re seeking a bold, eye-catching hue or a more subtle, pastel-inspired accent, the possibilities are endless. This technique involves strategically applying a strip of colored tape to the top section of your hair, creating a striking contrast that instantly elevates your overall appearance.
Unleashing Your Creative Potential
The beauty of colored tape-ups lies in their ability to let you experiment with different colors and patterns. From vibrant neon shades to soft, muted tones, the choice is entirely up to you. You can opt for a single, bold color or mix and match various hues to create a unique, multi-dimensional look. The tape can be applied in a variety of ways, such as a single stripe, a zig-zag pattern, or even a gradient effect, allowing you to truly personalize your hairstyle.
Effortless Application and Removal
One of the most appealing aspects of colored tape-ups is their ease of application and removal. The tape is designed to adhere securely to your hair, ensuring that your vibrant accent stays in place throughout the day. When you’re ready to switch up your look, the tape can be removed without causing any damage to your natural hair, making it a versatile and low-commitment option for those who love to experiment with their style.
Elevating Your Everyday Look
Colored tape-ups are not just for special occasions; they can be seamlessly incorporated into your everyday hairstyles. Whether you’re rocking a sleek ponytail, a messy bun, or even your natural curls, the addition of a vibrant tape-up can instantly elevate your look and add a touch of playfulness to your overall appearance.
Embracing the Trend: Inspiration and Styling Tips
As you explore the world of colored tape-ups, don’t be afraid to get creative and experiment with different styles and color combinations. Take inspiration from fashion and beauty influencers, or let your personal style guide you in choosing the perfect hue and placement for your tape-up. With a little bit of creativity and a touch of confidence, you can transform your hair into a true work of art.
Two-Tone Tape Up
The two-tone tape up is a captivating hair trend that has taken the beauty world by storm. This bold and dynamic look involves dyeing the hair on top in two contrasting colors, creating a striking visual effect that instantly commands attention. Whether you’re seeking a dramatic transformation or simply want to add a touch of flair to your hairstyle, the two-tone tape up offers a unique and eye-catching solution.
Unleashing Your Creativity: Choosing the Perfect Color Combination
The key to a successful two-tone tape up lies in the selection of the right color combination. From vibrant neon hues to soft, pastel shades, the possibilities are endless. Experiment with contrasting colors that complement your skin tone and personal style, or opt for a more subtle approach by choosing shades within the same color family. The beauty of this style lies in its ability to allow you to express your individuality and showcase your unique sense of fashion.
Achieving the Perfect Blend: Mastering the Technique
Executing a flawless two-tone tape up requires a skilled hand and a keen eye for detail. The process typically involves carefully sectioning the hair, applying the desired colors, and blending them seamlessly to create a cohesive and polished look. It’s important to work with a experienced hair stylist who can guide you through the process and ensure that the final result is both visually stunning and long-lasting.
Embracing the Versatility: Styling Options Galore
The beauty of the two-tone tape up lies in its versatility. Whether you prefer a sleek and sophisticated updo or a tousled, textured look, this hairstyle can be easily adapted to suit your personal preferences. Experiment with different styling techniques, such as braids, waves, or slicked-back looks, to create a unique and personalized expression of your style.
Maintaining the Vibrancy: Caring for Your Two-Tone Tape Up
To ensure that your two-tone tape up maintains its vibrant and eye-catching appearance, it’s essential to invest in proper hair care. Use color-protecting shampoos and conditioners, and consider incorporating deep conditioning treatments to keep your hair healthy and hydrated. Regularly touch up the roots as your hair grows out to maintain the sharp contrast between the two colors.
Ombre Tape Up
Blending Colors for a Seamless Transition
The ombre tape up is a captivating hairstyle that combines the convenience of tape-in extensions with the visual interest of a gradual color transition. The key to achieving this look is to carefully blend the colors, creating a seamless gradient that flows effortlessly from one shade to the next. This technique requires precision and skill, as the placement and application of the tape-in extensions must be meticulously planned to ensure a natural-looking result.
Customizing the Color Palette
One of the advantages of the ombre tape up is the ability to personalize the color palette to suit your individual preferences and skin tone. Whether you opt for a subtle, natural-looking transition or a bold, dramatic contrast, the ombre effect can be tailored to complement your unique features and style. Consulting with a skilled hair stylist is recommended to ensure the chosen colors flatter your complexion and complement your overall aesthetic.
Maintaining the Ombre Tape Up
Proper maintenance is crucial for preserving the vibrant, seamless appearance of the ombre tape up. Regular touch-ups and reapplications of the tape-in extensions are necessary to maintain the desired color distribution and prevent visible regrowth. Additionally, using gentle, sulfate-free hair care products and avoiding excessive heat styling can help extend the lifespan of the ombre tape up, ensuring it remains a stunning and low-maintenance hairstyle.
Versatility and Styling Options
The ombre tape up offers a versatile canvas for a variety of styling options. Whether you prefer sleek and straight, tousled waves, or even intricate updos, the gradual color transition can enhance and complement a wide range of hairstyles. Experimenting with different styling techniques can help you discover the most flattering and eye-catching look for your ombre tape up, allowing you to express your personal style with confidence.
Highlighted Tape Up
In the ever-evolving world of hair styling, the highlighted tape-up has emerged as a game-changer, offering a unique and visually captivating way to enhance your overall appearance. This innovative technique combines the sleek and polished look of a tape-up with the added dimension and depth that strategic highlights can provide.
Unlocking the Power of Highlights
The key to the highlighted tape-up lies in the strategic placement of highlights throughout the top section of the hair. By carefully selecting the areas to be highlighted, stylists can create the illusion of depth and dimension, adding a touch of sophistication and vibrancy to the overall style. This technique is particularly effective for individuals with a receding hairline or those seeking to create the appearance of a fuller, more voluminous look.
Customizing Your Highlighted Tape-Up
One of the greatest advantages of the highlighted tape-up is its versatility. Depending on your personal preferences and the desired aesthetic, you can work with your stylist to determine the placement, intensity, and color of the highlights. Whether you opt for subtle, natural-looking highlights or bold, contrasting hues, the highlighted tape-up can be tailored to complement your unique features and personal style.
Maintaining the Highlighted Tape-Up
Proper maintenance is key to ensuring the longevity and vibrancy of your highlighted tape-up. Regular visits to your stylist for touch-ups and trims will help keep the style looking its best, while the use of high-quality hair care products can help preserve the health and shine of your highlighted strands. With the right care and attention, your highlighted tape-up can become a signature look that turns heads and boosts your confidence.
Embracing the Highlighted Tape-Up Trend
As the highlighted tape-up continues to gain popularity, it’s clear that this innovative style offers a unique and visually striking way to elevate your appearance. Whether you’re seeking a subtle enhancement or a bold, eye-catching look, the highlighted tape-up provides a versatile and customizable solution that can help you feel confident and stylish in any setting.
Braided Tape Up
Tape ups have long been a popular hairstyle choice, offering a sleek and polished look. But what if you could take this classic style to the next level? Enter the braided tape up – a captivating fusion of traditional tape up techniques and the intricate beauty of braids.
Embracing the Braided Tape Up Aesthetic
The braided tape up is a hairstyle that combines the clean lines and precision of a tape up with the intricate, textured appeal of braids. By incorporating braids into the top section of the hair, this style adds a unique and eye-catching element that sets it apart from a standard tape up.
The braids can be styled in a variety of ways, from classic three-strand plaits to more elaborate designs like cornrows or fishtail braids. The versatility of this style allows you to customize it to suit your personal preferences and face shape, ensuring a look that is truly your own.
Achieving the Perfect Braided Tape Up
Creating a flawless braided tape up requires a combination of skill and attention to detail. It’s important to start with a clean, well-groomed base, ensuring that the hair is properly prepped and ready for the braiding process.
Once the braids are in place, the tape up portion of the style is applied, seamlessly blending the braided top with the tapered sides and back. This intricate process requires a steady hand and a keen eye for precision, as the goal is to achieve a cohesive, polished look that showcases the best of both techniques.
Maintaining the Braided Tape Up
Proper maintenance is key to keeping your braided tape up looking its best. Regular touch-ups and reapplications of the tape may be necessary to maintain the clean, sharp lines of the style. Additionally, caring for the braided section by using gentle, moisturizing products and avoiding excessive manipulation can help preserve the integrity of the braids.
With the right care and attention, a braided tape up can be a stunning and long-lasting hairstyle that sets you apart from the crowd. Whether you’re looking to add a touch of elegance to your everyday look or make a bold statement, this unique style is sure to turn heads and inspire admiration.
Cornrow Tape Up
The cornrow tape up is a versatile hairstyle that combines the classic cornrow technique with the sleek and polished appearance of a tape up. This style is perfect for those seeking a modern and sophisticated look that is both practical and visually striking.
Preparing the Hair
The first step in achieving the cornrow tape up is to properly prepare the hair. This involves thoroughly cleansing and conditioning the strands to ensure they are manageable and free of any product buildup. Once the hair is clean, it should be lightly oiled or moisturized to enhance the styling process.
Cornrow Braiding Technique
The cornrow portion of the style is created by carefully braiding the hair from the nape of the neck up towards the crown. The braids should be tight and uniform, with each row following a straight, parallel pattern. This attention to detail is crucial for achieving the desired sleek and polished appearance.
Taping the Cornrows
Once the cornrows are in place, the next step is to apply the tape. High-quality, double-sided tape is carefully applied along the length of the cornrows, securing the braids in place and creating a smooth, seamless finish. This taping process helps to maintain the style’s shape and hold throughout the day.
Styling the Top Section
The final step in the cornrow tape up process is to style the hair on top. This can be achieved by brushing the remaining hair back and securing it in place with additional tape or a small amount of styling product. The result is a sleek, slicked-back appearance that complements the cornrow pattern below.
Maintaining the Cornrow Tape Up
To ensure the longevity of the cornrow tape up, it is important to follow proper maintenance techniques. This includes gently cleansing the scalp and hair, avoiding excessive manipulation, and reapplying the tape as needed. With proper care, the cornrow tape up can last for several weeks, providing a stylish and low-maintenance option for those seeking a modern and sophisticated look.
Dreadlock Tape Up

The dreadlock tape up is a captivating hairstyle that combines the rugged charm of dreadlocks with the sleek sophistication of a taped-up style. This unique blend creates a look that is both bohemian and effortlessly chic, perfect for those seeking to add a touch of carefree flair to their appearance.
Preparing the Dreadlocks
The foundation of the dreadlock tape up is, of course, the dreadlocks themselves. Whether you’ve been growing your dreadlocks for years or are just starting the process, it’s essential to ensure they are well-maintained and ready for the tape up. This may involve regular washing, conditioning, and even trimming to keep the dreadlocks neat and uniform in appearance.
Taping the Dreadlocks
The key to achieving the perfect dreadlock tape up lies in the taping technique. Begin by gathering the dreadlocks on the top of your head, ensuring they are neatly arranged and free of tangles. Gently secure the dreadlocks in place using a high-quality, flexible tape, such as sports or medical tape. The tape should be applied with care, avoiding any tension or pulling that could damage the delicate dreadlocks.
Styling the Dreadlock Tape Up
Once the dreadlocks are securely taped, it’s time to style the look. Experiment with different placements and angles to find the most flattering and visually appealing arrangement. You may choose to leave some dreadlocks loose and cascading, or tuck them neatly under the tape for a sleeker, more polished appearance. Finish the style with a light hold hairspray or pomade to ensure the dreadlocks stay in place throughout the day.
Maintaining the Dreadlock Tape Up
To keep your dreadlock tape up looking its best, it’s important to maintain both the dreadlocks and the tape. Regularly check the tape for any signs of loosening or peeling, and replace it as needed. Additionally, continue to care for your dreadlocks by washing, conditioning, and trimming them as necessary to maintain their healthy, vibrant appearance.
Shaved Design Tape Up
In the ever-evolving world of hairstyles, the shaved design tape up has emerged as a popular choice for those seeking a unique and personalized touch to their look. This innovative technique involves shaving a specific pattern or design into the sides or back of the hair, creating a visually striking and eye-catching effect.
Unleashing Your Creativity
The beauty of the shaved design tape up lies in its ability to allow you to express your individuality. Whether you’re drawn to intricate geometric patterns, bold tribal designs, or delicate floral motifs, the possibilities are endless. By working closely with your stylist, you can collaborate to bring your vision to life, ensuring that your hairstyle reflects your personal style and aesthetic preferences.
The Art of Precision
Executing a shaved design tape up requires a skilled hand and a keen eye for detail. Your stylist will carefully map out the desired pattern, using precision tools to meticulously shave the hair to create the desired effect. This process demands a high level of artistry, as even the slightest deviation can alter the overall look. The end result is a hairstyle that is both visually striking and uniquely tailored to you.
Maintaining the Look
Keeping your shaved design tape up looking its best requires some maintenance. Regular trims and touch-ups may be necessary to ensure the edges remain sharp and the design remains crisp. Your stylist can provide guidance on the best care and upkeep techniques, ensuring that your personalized hairstyle remains a statement piece for weeks to come.
Embracing the Versatility
One of the great advantages of the shaved design tape up is its versatility. Whether you prefer a sleek, polished look or a more textured, edgy style, the shaved design can be seamlessly integrated into a variety of hairstyles. This allows you to experiment and switch up your look, keeping your personal style fresh and dynamic.
Tapered Edges Tape Up
The tapered edges tape up is a hairstyling technique that elevates the overall appearance of a well-groomed look. By carefully defining the edges of the hairline and tapering them, this method creates a sharp, clean, and refined aesthetic that exudes a sense of sophistication and attention to detail.
The Art of Tapering
The key to the tapered edges tape up lies in the precise execution of the tapering process. Rather than abruptly cutting the hair at the hairline, the stylist gradually reduces the length of the strands, creating a seamless transition from the longer hair to the shorter, tapered edges. This gradual tapering not only enhances the visual appeal but also helps to prevent an unnatural or harsh appearance.
Defining the Hairline
Alongside the tapering, the tapered edges tape up also focuses on clearly defining the hairline. By using a combination of cutting techniques and strategic product application, the stylist can shape the hairline to achieve a clean, well-delineated look. This attention to the hairline’s definition helps to frame the face and accentuate the overall hairstyle, creating a polished and intentional appearance.
The Benefits of Tapered Edges
The tapered edges tape up offers several benefits for those seeking a refined and well-groomed look. The gradual tapering of the edges helps to soften the appearance of the hairline, creating a more natural and harmonious transition between the hair and the skin. Additionally, the defined hairline can help to enhance facial features and create a more balanced and symmetrical appearance. This technique is particularly useful for individuals with thick or coarse hair, as the tapering can help to prevent an overly harsh or unruly look.
Maintaining the Tapered Edges
Achieving the perfect tapered edges tape up is only the first step. Maintaining the look requires regular upkeep and touch-ups. Depending on the individual’s hair growth and desired level of precision, the tapered edges may need to be refreshed every few weeks to ensure the sharp, clean lines are consistently maintained. With proper care and attention, the tapered edges tape up can become a signature look that exudes confidence and a well-groomed aesthetic.
Layered Tape Up
Tape-ups have long been a popular hairstyle choice, but the traditional flat, one-dimensional look can sometimes feel a bit lackluster. Enter the layered tape-up – a style that adds depth, dimension, and visual interest to the classic tape-up design. By strategically layering the hair on top, this technique creates a multi-textured, dynamic look that can elevate any outfit or occasion.
The Art of Layering
The key to a successful layered tape-up lies in the precision of the cutting and styling. Rather than simply pulling the hair straight back, the stylist will carefully section the hair and trim it at varying lengths, creating a staggered, layered effect on top. This layering technique not only adds volume and movement to the style but also helps to frame the face and accentuate the features.
Customizing the Look
One of the great advantages of the layered tape-up is its versatility. Depending on the desired aesthetic, the layers can be cut short and textured for a more edgy, punk-inspired look, or left longer and more flowing for a softer, more romantic vibe. The styling options are endless, allowing the wearer to experiment and find the perfect balance of structure and fluidity.
Maintenance and Longevity
Maintaining a layered tape-up requires a bit more attention than a traditional flat style, but the results are well worth the effort. Regular trims and touch-ups are essential to keep the layers looking sharp and defined, and the use of high-quality styling products can help to keep the hair in place throughout the day. With proper care, a layered tape-up can last for weeks, providing a versatile and eye-catching hairstyle that will turn heads wherever you go.
Disconnected Tape Up
The disconnected tape up is a bold and modern hairstyle that has gained immense popularity in recent years. This striking look is characterized by a distinct disconnect between the longer hair on the top of the head and the shorter sides and back, creating a striking visual contrast that commands attention.
Achieving the Perfect Disconnect
Mastering the disconnected tape up requires a skilled hand and a keen eye for detail. The key to this style lies in the precise blending of the longer top section with the shorter sides and back. The transition should be seamless, with a clean and defined line separating the two lengths. This attention to detail is essential for creating a polished and professional appearance.
Versatility and Styling Options
One of the greatest advantages of the disconnected tape up is its versatility. The longer top section can be styled in a variety of ways, from sleek and slicked-back looks to textured and messy styles. This flexibility allows individuals to tailor the look to their personal preferences and face shape, ensuring a customized and flattering result.
Maintenance and Upkeep
Maintaining the disconnected tape up requires regular visits to a skilled barber or stylist. The precise blending and shaping of the style necessitates frequent trims to keep the lines sharp and the transition seamless. Additionally, proper hair care products and techniques, such as using a high-quality pomade or wax, can help to keep the style in place and looking its best throughout the day.
Embracing the Bold and Modern
The disconnected tape up is a bold and modern hairstyle that exudes confidence and style. By embracing the distinct disconnect between the longer top and shorter sides, individuals can create a look that is both eye-catching and versatile. Whether you’re seeking a professional, edgy, or simply a unique and stylish appearance, the disconnected tape up is a hairstyle worth considering.
Asymmetrical Tape Up
Asymmetrical Tape-Up: Elevating Your Style with Unbalanced Flair
Embracing the Unconventional: Asymmetrical Tape-Up Designs
In the ever-evolving world of hairstyling, the asymmetrical tape-up has emerged as a captivating trend that challenges the conventional symmetry of traditional updos. This innovative approach to hair styling offers a refreshing and eye-catching alternative, allowing individuals to express their unique sense of style and individuality.
Unbalanced Elegance: The Art of Asymmetrical Tape-Ups
The defining feature of an asymmetrical tape-up lies in its unbalanced design, where the length or styling on one side of the head differs from the other. This deliberate imbalance creates a striking visual impact, adding an element of unexpected elegance to the overall look. Whether it’s a longer section cascading down one side or a more intricate, sculptural arrangement on the other, the asymmetrical tape-up invites the wearer to embrace their creativity and step outside the boundaries of traditional hairstyles.
Versatility and Customization: Tailoring the Asymmetrical Tape-Up
One of the remarkable aspects of the asymmetrical tape-up is its versatility. This hairstyle can be adapted to suit a wide range of face shapes, hair textures, and personal preferences. By playing with the placement, volume, and texture of the different sections, stylists can create a truly unique and personalized look for each individual. From sleek and sophisticated to textured and bohemian, the asymmetrical tape-up offers endless possibilities for self-expression.
Elevating Everyday Looks: The Transformative Power of Asymmetry
Beyond its inherent visual appeal, the asymmetrical tape-up also possesses the power to elevate everyday looks. Whether it’s a formal event, a night out, or a casual daytime ensemble, this hairstyle can instantly add a touch of modern elegance and a sense of effortless sophistication to any outfit. By breaking away from the constraints of symmetry, the asymmetrical tape-up allows wearers to make a bold statement and stand out from the crowd.
Embracing the Unconventional: Exploring the Asymmetrical Tape-Up
As the demand for unique and personalized hairstyles continues to grow, the asymmetrical tape-up has emerged as a captivating trend that celebrates individuality and challenges traditional norms. By embracing the unbalanced and the unexpected, this hairstyle invites wearers to express their creativity, enhance their personal style, and elevate their overall appearance with a touch of modern flair.
Textured Fringe Tape Up
In the ever-evolving world of hairstyles, the textured fringe tape up has emerged as a captivating trend that effortlessly blends sophistication and youthful flair. This versatile look offers a unique twist on the classic tape up, elevating the style with a textured, piece-y fringe that frames the forehead, creating a visually striking and on-trend appearance.
Embracing the Textured Fringe
The textured fringe tape up is a departure from the sleek, uniform look often associated with traditional tape ups. By incorporating a textured, piece-y fringe, the style introduces a sense of movement and dimension to the overall hairstyle. This textured element adds a touch of effortless cool, lending the wearer a youthful and trendy aesthetic that is sure to turn heads.
Achieving the Perfect Textured Fringe
Crafting the perfect textured fringe tape up requires a delicate balance of technique and styling prowess. The key lies in carefully layering and texturizing the fringe area, using a combination of cutting techniques and strategic product application. This process allows the fringe to fall in a natural, piece-y manner, creating the desired textured effect that seamlessly blends with the rest of the tape up.
Versatility and Styling Possibilities
The beauty of the textured fringe tape up lies in its versatility. This style can be adapted to suit a wide range of face shapes and personal styles, making it an appealing option for those seeking a modern and customizable look. Whether paired with a sleek, slicked-back tape up or a more relaxed, tousled version, the textured fringe adds a touch of effortless sophistication that can elevate any hairstyle.
Embracing the Trend: Elevating Your Look
By embracing the textured fringe tape up, individuals can elevate their hairstyle and embrace the latest trends in a way that complements their unique features and personal style. This captivating look offers a fresh and youthful twist on the classic tape up, making it a must-try for those seeking to stay ahead of the curve in the ever-evolving world of hair fashion.
Slicked Tape Up

Mastering the slicked-back hairstyle is a timeless technique that can elevate your overall appearance, exuding a sophisticated and polished look. This style is versatile, suitable for both formal and casual occasions, and can be tailored to suit a variety of hair types and lengths. Whether you’re aiming for a classic, retro-inspired vibe or a modern, edgy aesthetic, the slicked-back look is a go-to choice that can help you achieve your desired style.
Preparing Your Hair
The key to a successful slicked-back hairstyle lies in the preparation. Start by ensuring your hair is clean and free of any product buildup. This will allow the styling products to grip your strands effectively and provide the necessary hold. If your hair is on the longer side, consider giving it a light trim to maintain a neat, well-groomed appearance.
Selecting the Right Products
Choosing the appropriate styling products is crucial for achieving the perfect slicked-back look. Opt for a high-hold, water-based pomade or gel that will provide a strong, long-lasting hold without leaving your hair feeling stiff or crunchy. Avoid oil-based products, as they can weigh down your hair and create an undesirable sheen. Experiment with different formulas to find the one that best suits your hair type and desired level of shine.
Mastering the Technique
Begin by applying a small amount of your chosen styling product to damp or towel-dried hair, focusing on the roots and working your way towards the ends. Use a fine-toothed comb or your fingers to slick the hair back, ensuring a smooth and uniform appearance. For added hold and definition, you can use a blow dryer on a low setting to set the style in place. Finish with a light misting of a flexible-hold hairspray to keep flyaways at bay and maintain the sleek, polished look throughout the day.
Customizing the Style
The beauty of the slicked-back hairstyle lies in its versatility. Experiment with different variations, such as a deep side part, a textured finish, or even incorporating a subtle wave or curl. By playing with the placement and amount of product, you can create a range of looks to suit your personal style and the occasion.
Wet Look Tape Up
The wet look tape up is a popular hairstyle that creates the illusion of freshly washed, glistening locks. This style is perfect for those who want to achieve a sleek, polished appearance with a touch of effortless elegance. To master the wet look tape up, follow these step-by-step instructions:
Prepare the Hair
Start by thoroughly cleansing your hair with a moisturizing shampoo and conditioner. This will ensure a clean canvas for the styling process. Towel-dry your hair, leaving it slightly damp but not completely dry.
Apply the Right Products
Invest in a high-quality hair gel or pomade that is specifically formulated to provide a wet, glossy finish. Avoid products that may leave your hair feeling crunchy or stiff. Apply a small amount of the product to your palms and distribute it evenly through your hair, focusing on the top and front sections.
Slick It Back
Using a fine-toothed comb or your fingers, gently comb your hair back, starting from the forehead and working towards the crown. Ensure that the hair is smoothed down and all flyaways are tamed. For added hold and shine, you can mist your hair with a light-hold hairspray.
Finish with a Tape Up
To complete the wet look tape up, use a strong-hold styling product, such as a wax or pomade, to create a clean, defined tape up at the sides and back of your head. Smooth the product through the hair, ensuring a sleek and polished finish.
Maintain the Look
To keep your wet look tape up looking fresh throughout the day, carry a small amount of the styling product with you and reapply as needed. Avoid touching your hair excessively, as this can disrupt the smooth, glossy finish.
By following these steps, you can achieve the perfect wet look tape up and elevate your style with a touch of sophistication and effortless cool.
Matte Tape Up
The matte tape up is a versatile hairstyle that offers a natural and understated aesthetic. Unlike the sleek, shiny appearance of a traditional tape up, this variation focuses on creating a matte finish that blends seamlessly with the natural texture of the hair. This style is perfect for those who prefer a more subtle and effortless look, without sacrificing the polished and well-groomed appearance of a tape up.
Preparing the Hair
The key to achieving the matte tape up lies in the preparation of the hair. Start by thoroughly cleansing the scalp and strands, ensuring that any excess oil or product buildup is removed. This will help create a clean canvas for the styling process. After washing, gently towel-dry the hair, leaving it slightly damp but not completely dry.
Applying the Right Products
The next step is to select the appropriate styling products. Opt for a matte-finish pomade or clay-based product that will provide hold and texture without adding shine. These products are designed to absorb excess oil and create a natural, pliable finish. Apply a small amount of the product to the palms of your hands and distribute it evenly through the hair, focusing on the top and sides.
Styling the Tape Up
With the product in place, begin styling the tape up. Use a comb or your fingers to create the desired shape and direction of the hair. Gently tease or backcomb the hair at the crown to add volume and texture, then smooth the sides and back to create a clean, tapered appearance. Finish by lightly misting the style with a flexible-hold hairspray to maintain the matte finish throughout the day.
Maintaining the Matte Tape Up
To keep the matte tape up looking its best, it’s important to avoid over-styling or adding too much product. Limit the use of heavy oils or serums, as these can create an unwanted sheen. Instead, use a dry shampoo or powder-based product to absorb excess oil and refresh the matte finish as needed. With proper care and maintenance, the matte tape up can provide a stylish and low-maintenance look that complements a variety of personal styles and occasions.
Shiny Tape Up
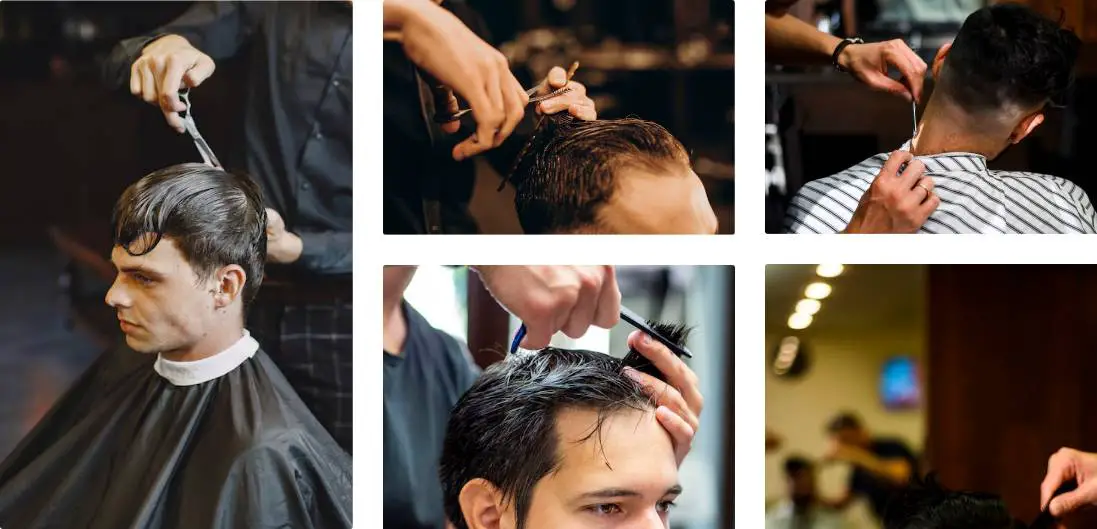
Elevate your style with the captivating allure of a shiny tape-up hairstyle. This sophisticated look combines the sleekness of a taped-up design with a high-shine finish, creating a striking and glamorous appearance that commands attention.
Achieving the Shiny Tape-Up Look
The key to a successful shiny tape-up lies in the careful execution of the styling process. Begin by thoroughly cleansing and conditioning your hair, ensuring a smooth and manageable foundation. Next, apply a high-shine styling product, such as a hair serum or pomade, to the top section of your hair. Gently comb or brush the hair upwards, creating a sleek and polished appearance.
Securing the Tape-Up
To achieve the signature tape-up effect, use a strong-hold styling product, such as a gel or wax, to firmly secure the hair in place. Carefully apply the product to the sides and back of your head, smoothing the hair towards the top section. Use a fine-toothed comb or your fingers to create a clean, defined line along the hairline, ensuring a seamless transition between the taped-up section and the rest of your hairstyle.
Enhancing the Shine
To amplify the shiny finish, consider using a lightweight, high-shine hairspray or a glossing serum. Lightly mist or apply the product to the taped-up section, focusing on the top area. This will help to lock in the shine and create a stunning, reflective effect that catches the light and adds an extra touch of glamour to your look.
Versatility and Styling Options
The beauty of the shiny tape-up hairstyle lies in its versatility. You can experiment with different variations, such as a sleek, slicked-back look or a more voluminous, textured style. Additionally, the shiny tape-up can be easily incorporated into a range of formal and casual occasions, from elegant events to everyday wear, making it a versatile and stylish choice for any occasion.
Volumized Tape Up
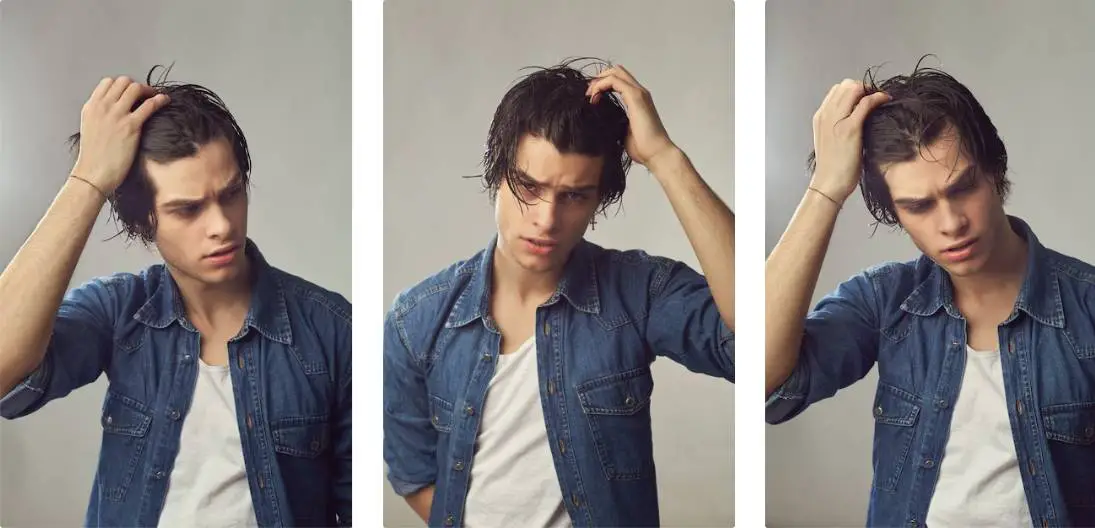
Mastering the Tape-Up Technique
The tape-up hairstyle is a popular choice for those seeking a bold, eye-catching look. At its core, the technique involves securing the hair on top of the head with tape, creating a volumized and lifted appearance. Mastering this style requires a delicate balance of proper sectioning, strategic tape placement, and skillful styling. By understanding the nuances of the tape-up method, you can elevate your hair game and achieve a stunning, head-turning look.
Volumizing the Top Section
The key to a voluminous tape-up lies in the preparation and styling of the top section of the hair. Begin by thoroughly cleansing and conditioning the hair, ensuring a clean canvas to work with. Next, apply a volumizing product, such as a mousse or root-lifting spray, to the roots and mid-lengths of the top section. This will provide the necessary foundation for the desired lift and fullness. Carefully section the hair, separating the top portion from the sides and back, and secure the lower sections out of the way.
Strategically Placing the Tape
The placement of the tape is crucial in achieving the volumized tape-up look. Start by applying the tape horizontally across the crown, just above the ears. Gently pull the hair upward and secure the tape, creating an immediate lift. Continue this process, adding additional strips of tape in a vertical or diagonal pattern, depending on your desired style and the shape of your head. Ensure that the tape is applied with even tension, avoiding any bumps or uneven sections.
Tousled Tape Up
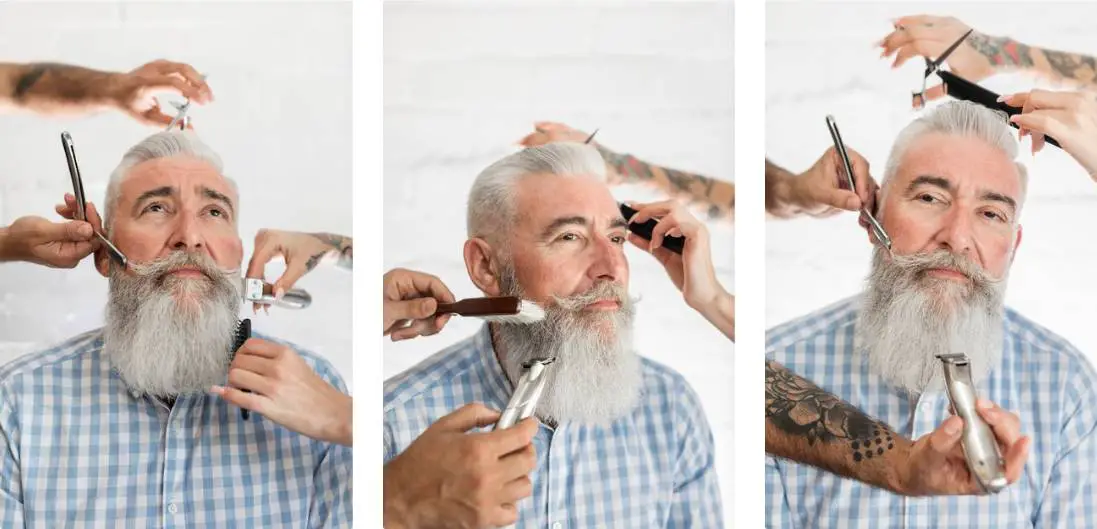
In the ever-evolving world of hairstyles, the tousled tape up has emerged as a captivating trend that celebrates the beauty of imperfection. This versatile look effortlessly blends a polished updo with a touch of carefree charm, creating a style that is both sophisticated and undeniably alluring.
Unleashing the Charm of Tousled Texture
The essence of the tousled tape up lies in its ability to strike a delicate balance between structure and fluidity. Unlike the sleek, perfectly coiffed updos of the past, this style embraces a slightly disheveled, lived-in appearance. The hair on top is left slightly tousled, allowing natural waves and flyaways to add depth and character to the overall look. This effortless touch of imperfection lends an air of relaxed elegance, making the wearer appear effortlessly chic.
Versatility and Adaptability
One of the standout features of the tousled tape up is its remarkable versatility. This style can be easily adapted to suit a wide range of occasions, from casual everyday outings to formal events. By adjusting the degree of tousling and the placement of the tape-up elements, the look can be tailored to complement different face shapes, hair textures, and personal styles. Whether you’re seeking a laid-back weekend vibe or a touch of sophistication for a special occasion, the tousled tape up offers a versatile solution that caters to your needs.
Embracing the Art of Imperfection
The tousled tape up celebrates the beauty of imperfection, encouraging wearers to embrace their natural hair texture and individuality. Rather than striving for a flawless, rigid appearance, this style celebrates the unique character and movement of each person’s hair. By embracing the slight irregularities and flyaways, the tousled tape up creates a sense of effortless elegance that is both captivating and empowering.
Achieving the Tousled Tape Up
Crafting the perfect tousled tape up requires a delicate balance of technique and a willingness to let go of perfection. The key is to start with a well-executed tape-up foundation, ensuring the hair is securely gathered and pinned in place. Then, gently tousle and manipulate the top section, allowing natural waves and flyaways to emerge. The result is a hairstyle that exudes a sense of relaxed sophistication, inviting the wearer to embrace their unique beauty with confidence.
Swept Back Tape Up
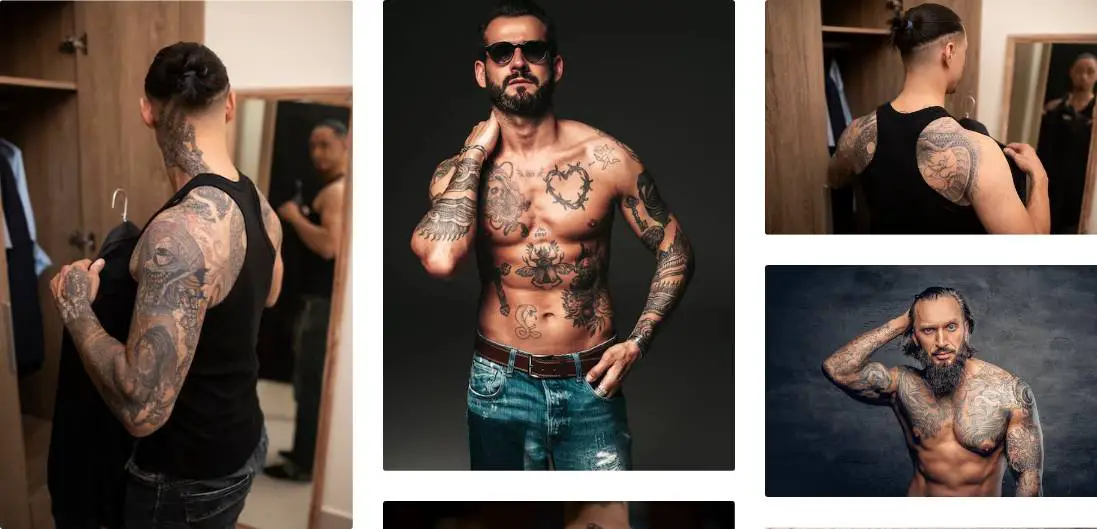
The swept back tape up is a versatile hairstyle that exudes a clean and sophisticated look. This style involves sweeping the hair on top of the head back and away from the forehead, creating a sleek and polished appearance. Whether you’re attending a formal event or simply want to elevate your everyday look, the swept back tape up is a go-to option that can be easily achieved with the right techniques.
Preparing the Hair
The first step in creating a swept back tape up is to ensure your hair is clean and dry. Start by washing your hair with a gentle shampoo and conditioner, then towel-dry it until it’s slightly damp. This will help the hair hold the style better and prevent it from becoming too stiff or crunchy.
Applying the Tape
Next, apply a small amount of hair tape or styling product to the roots of your hair. This will help to hold the style in place and provide a smooth, seamless finish. Gently comb the hair back and away from the forehead, using your fingers to guide the strands into the desired position.
Securing the Style
Once the hair is swept back, use a fine-toothed comb or your fingers to smooth any flyaways or uneven sections. Then, apply a light-hold hairspray or finishing product to the style to help it stay in place throughout the day. You can also use a small amount of wax or pomade to add extra shine and definition to the look.
Customizing the
The beauty of the swept back tape up is that it can be customized to suit your individual style and face shape. For a more dramatic look, you can use a stronger hold product and sweep the hair back more tightly. Alternatively, for a softer, more natural appearance, you can use a lighter touch and allow some of the hair to fall naturally around the face.
Regardless of your personal preferences, the swept back tape up is a timeless and versatile hairstyle that can elevate any outfit and leave you feeling confident and polished. With a little practice and the right techniques, you can achieve this sophisticated look with ease.